Ham and Cheese Sticks
You’ll Be Hooked on These Ham and Cheese Sticks!
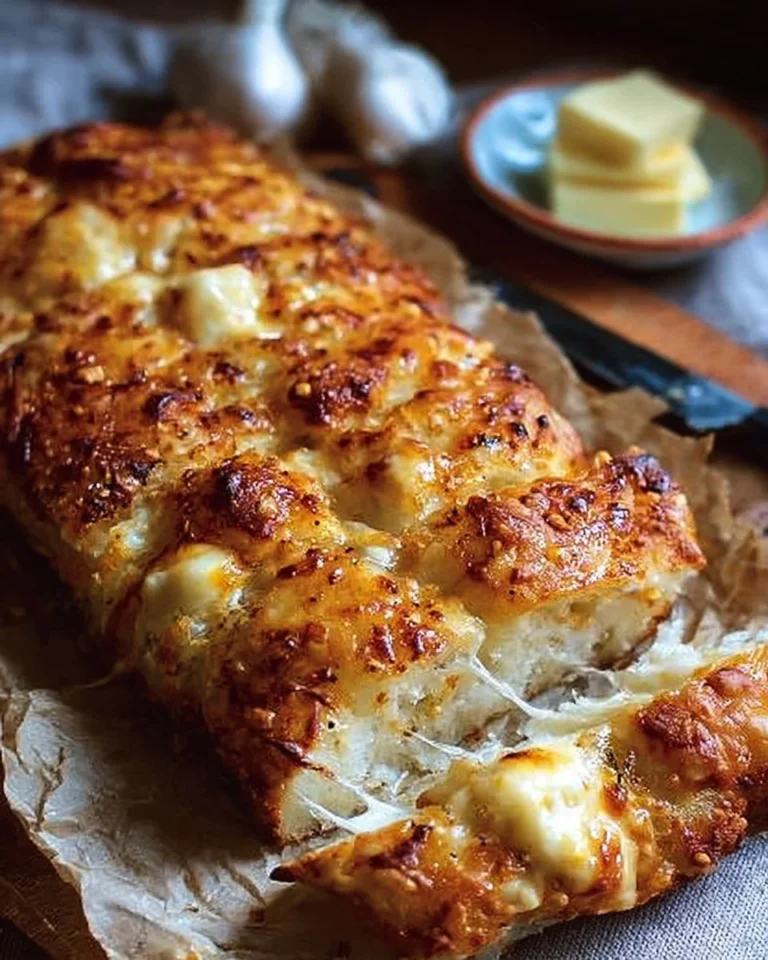
Ever had a snack that feels like a warm hug on a plate? Say hello to these Ham and Cheese Sticks! They’re super easy to whip up and perfect for just about any occasion, from a movie night to a festive get-together. Imagine crispy exterior, creamy cheese, and savory ham just waiting for you to take a bite. If that doesn’t make your taste buds tingle, I don’t know what will!
Why Make This Recipe
Here’s the thing: life is busy, and nobody wants to spend hours in the kitchen! These Ham and Cheese Sticks shine because:
- Quick & Easy: You can have these golden beauties ready in under 30 minutes. Yes, please!
- Family-Friendly: Even the pickiest eaters will gobble these up. Who can resist gooey cheese and salty ham?
- Minimal Cleanup: You basically just have one baking sheet to wash. It’s like the lazy chef’s dream 💪.
Ingredients
You don’t need fancy stuff — just these basics!
- 2 tubes crescent dough sheets
- 1 pound deli-sliced ham
- 8 cheddar cheese sticks
- ¼ cup melted butter
- 1 teaspoon Worcestershire sauce
- ½ tablespoon Dijon mustard
- ½ tablespoon dried minced onion or onion powder
- ½ tablespoon poppy seeds
Directions
Time to get cooking! Just follow these simple steps:
- Preheat your oven to 350°F (175°C). This is the magic number!
- Prepare a baking sheet by greasing it or lining it with parchment paper.
- Roll out your crescent dough sheets and cut each one into 4 pieces, resulting in 8 pieces total.
- Distribute the ham evenly among the 8 pieces of dough.
- Place a cheddar cheese stick on top of the ham on each piece.
- Fold in the ends of each piece and then roll to seal.
- Place the prepared sticks on the baking sheet.
- In a small bowl, mix together melted butter, Worcestershire sauce, Dijon mustard, onion, and poppy seeds.
- Brush the butter mixture over each stick.
- Place in the oven for 12-15 minutes or until they turn golden brown.
- Enjoy your Ham and Cheese Sticks hot and fresh from the oven!

How to Make Ham and Cheese Sticks (Overview)
Let’s break it down! Think of each step as part of a delicious journey.
- Start by warming up the oven – that’s your first hint that something tasty is on the way.
- Get your dough out and cut it into pieces.
- Layer on the ham and cheese, then wrap things up tight!
- Brush a tantalizing mix of butter and spices over your bundles of joy.
- Bake in the oven until they’re golden and irresistible.
Pro Tip: Feel free to let the melted butter soak in a bit before baking; it’ll give you those crispy edges we all love!
How to Serve Ham and Cheese Sticks
These Ham and Cheese Sticks are perfect for dipping! Whip up a tangy mustard sauce or simply pair them with your favorite marinara. Picture this: a crunchy golden shell, a gooey center, and an aromatic blend of spices wafting through your kitchen. Oh, and don’t forget to sprinkle some fresh herbs on top for a pop of color!
How to Store Ham and Cheese Sticks
If you happen to have leftovers (which is a big IF), they will keep well in the fridge for about 3-4 days. Just store them in an airtight container. Want to keep them longer? Toss them in the freezer, and they’ll be good for about 2-3 months. When you’re ready to enjoy them again, just pop them in the oven or microwave.
Tips to Make Ham and Cheese Sticks
- Timing is Key: Bake until those edges are golden; it makes all the difference in crunchiness.
- Ingredient Swaps: Use turkey or chicken slices instead of ham for a twist. Or try mozzarella instead of cheddar if you’re feeling adventurous!
- Texture Tips: If you want an extra crispy texture, consider pre-baking the crescent dough for a few minutes before adding the filling.
Variation
Feeling fancy? Add some spicy jalapeños for a kick or try using different types of cheese, like pepper jack or gouda. You can even make these vegan by substituting ham with tempeh and cheese with your favorite plant-based varieties!
FAQs
Can I make Ham and Cheese Sticks ahead of time?
Absolutely! You can prepare them, cover them, and keep them in the fridge until you’re ready to bake.
Can I freeze the Ham and Cheese Sticks?
Yes! Just cool them down completely and store in an airtight container. Remember, they’ll stay fresh for up to 3 months!
What can I dip these Ham and Cheese Sticks in?
Mustard, ketchup, or even ranch dressing works great! Get creative with your favorite sauces!
📌 Pin this recipe for your next cozy dinner night!

Ham and Cheese Sticks
Ingredients
Method
- Preheat your oven to 350°F (175°C).
- Prepare a baking sheet by greasing it or lining it with parchment paper.
- Roll out your crescent dough sheets and cut each one into 4 pieces, resulting in 8 pieces total.
- Distribute the ham evenly among the 8 pieces of dough.
- Place a cheddar cheese stick on top of the ham on each piece.
- Fold in the ends of each piece and then roll to seal.
- Place the prepared sticks on the baking sheet.
- In a small bowl, mix together melted butter, Worcestershire sauce, Dijon mustard, onion, and poppy seeds.
- Brush the butter mixture over each stick.
- Place in the oven for 12-15 minutes or until they turn golden brown.
- Enjoy your Ham and Cheese Sticks hot and fresh from the oven!