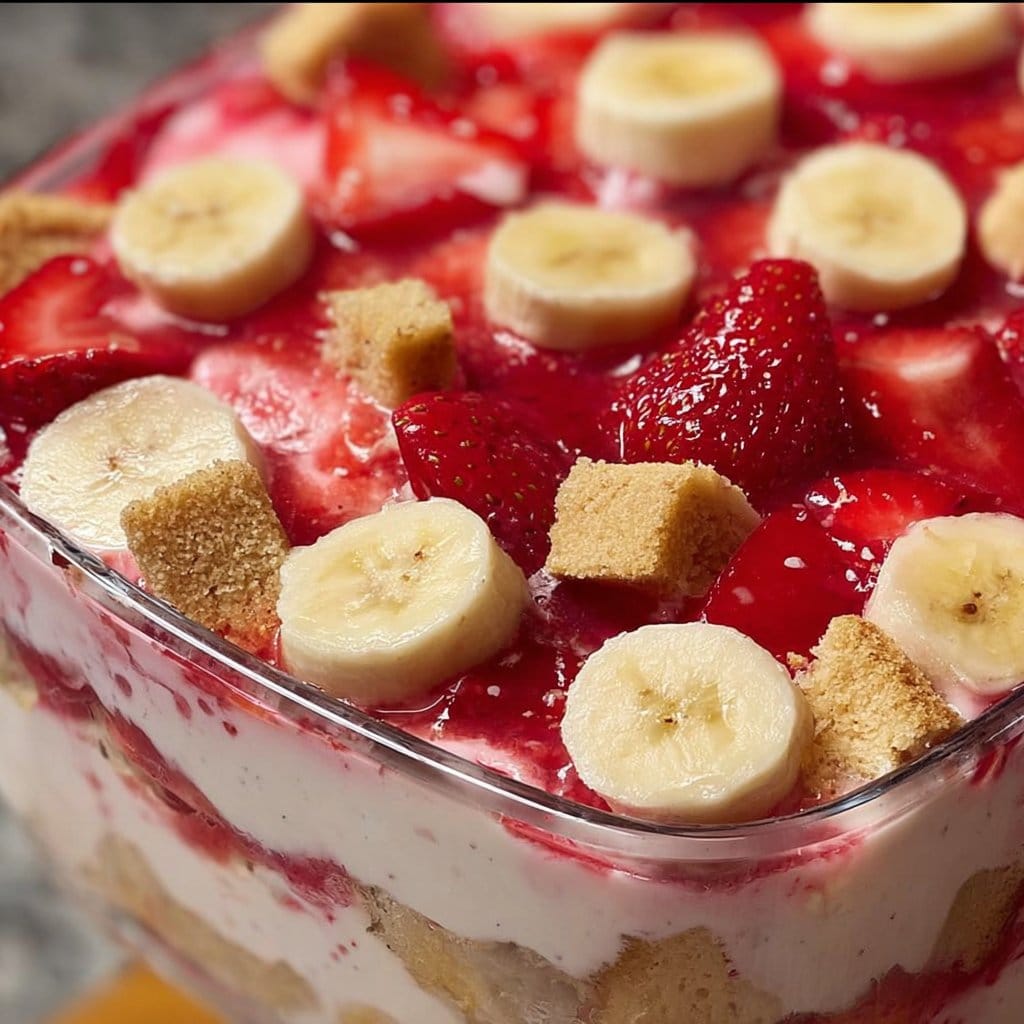
Strawberry Banana Pudding Dream
Who doesn’t love a dessert that instantly transports you to summer? 🍓🍌
If you’re craving something sweet, creamy, and a little indulgent, look no further than Strawberry Banana Pudding Dream. It’s quick to whip up, requires just one pan, and bursts with fresh flavors. Plus, it’s a nostalgic nod to childhood, making it the perfect treat for both kids and adults. Trust me, this pudding dream isn’t just a dessert; it’s an experience!
Why make this recipe
First off, this dessert is a family favorite that’s bound to have everyone reaching for seconds—and thirds! It’s relatively inexpensive and you probably have most of the ingredients on hand, so no fancy grocery trips required. Who doesn’t love a one-pan dessert that leaves your kitchen spick and span? It’s like the stars aligned perfectly for effortless dessert bliss!
Ingredients
You don’t need fancy stuff — just these basics! Here’s what you’ll need for your Strawberry Banana Pudding Dream:
- 2 boxes Vanilla Wafers
- 6 to 8 bananas, sliced
- 2 cups milk
- 1 container strawberries, hulled and sliced
- 1 (5 oz.) box French Vanilla pudding
- 1 (8 oz.) package cream cheese (room temperature is best)
- 1 (14 oz.) can sweetened condensed milk
- 1 (12 oz.) container whipped topping
Directions
Let’s make this pudding dream a reality! Here’s how you do it:
- In a mixing bowl, combine cream cheese and sweetened condensed milk until smooth.
- Add French Vanilla pudding and milk to the mixture and stir until well combined.
- In a large serving dish, layer vanilla wafers, followed by a layer of sliced bananas and strawberries.
- Pour half of the pudding mixture over the fruit and wafers.
- Repeat the layers with the remaining ingredients, finishing with the puding mixture on top.
- Spread whipped topping over the final layer.
- Refrigerate for at least 4 hours before serving to let those flavors mingle beautifully.
How to make Strawberry Banana Pudding Dream (Overview)
Getting your Strawberry Banana Pudding Dream ready is super simple! Just think of it as layering your fave ingredients:
- Start with the creaminess: Blend cream cheese and sweetened condensed milk.
- Add your flavorings: Mix in pudding and milk.
- Stack it up: Layer those crispy wafers, fresh bananas, and strawberries like you’re building a delicious, edible tower.
Pro tip: Don’t rush the chilling process. This step allows the pudding to set perfectly, ensuring every bite is pure bliss!
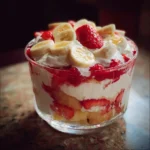
How to serve Strawberry Banana Pudding Dream
Serve this delightful dessert in a clear dish to showcase the sweet layers of color—golden wafers, vibrant strawberries, and creamy pudding all peek through to entice your guests. Pair it with a light sprinkle of crushed nuts for an added crunch or drizzle in some chocolate syrup for a twist! The aroma alone will make your mouth water.
How to store Strawberry Banana Pudding Dream
This creamy wonder will keep well in the fridge for 3 to 4 days. Just cover it tightly with plastic wrap or foil to keep it fresh. You can make it ahead too—just be sure to give it its chilling time for optimal taste. Avoid freezing it if possible; the texture might take a hit (nobody wants mushy pudding, right?).
Tips to make Strawberry Banana Pudding Dream
- Use ripe bananas: They add a naturally sweeter flavor and beautiful texture.
- Mix it up: Swap in pudding flavors or fruit for variety. How about chocolate pudding with raspberries?
- Chill it longer: Extra time in the fridge can enhance those flavors even more.
- Go dairy-free: Try almond cream cheese and coconut whipped topping for a vegan twist.
- Layer smart: Want it extra fancy? Try layering with cookies or a dusting of crushed cereal.
Variations
Feeling adventurous? Here are some easy twists you can try:
- Vegan Version: Use coconut milk and vegan cream cheese for a plant-based delight.
- Nutty Crunch: Add crushed nuts between the layers for texture.
- Frozen Delight: Freeze it for a frozen treat! Just expect a different texture when thawed.
FAQs
Can I make this pudding in advance?
Absolutely! Just let it chill in the fridge for a few hours or even overnight.
What if I don’t have vanilla wafers?
Graham crackers can be a good substitute, though the texture will be slightly different.
Can I freeze Strawberry Banana Pudding Dream?
While you can, freezing may change the creamy texture. It’s best served fresh!
📌 Pin this recipe for your next cozy dinner night!
Strawberry Banana Pudding Dream
Ingredients
Method
- In a mixing bowl, combine cream cheese and sweetened condensed milk until smooth.
- Add French Vanilla pudding and milk to the mixture and stir until well combined.
- In a large serving dish, layer vanilla wafers, followed by a layer of sliced bananas and strawberries.
- Pour half of the pudding mixture over the fruit and wafers.
- Repeat the layers with the remaining ingredients, finishing with the pudding mixture on top.
- Spread whipped topping over the final layer.
- Refrigerate for at least 4 hours before serving to let those flavors mingle beautifully.