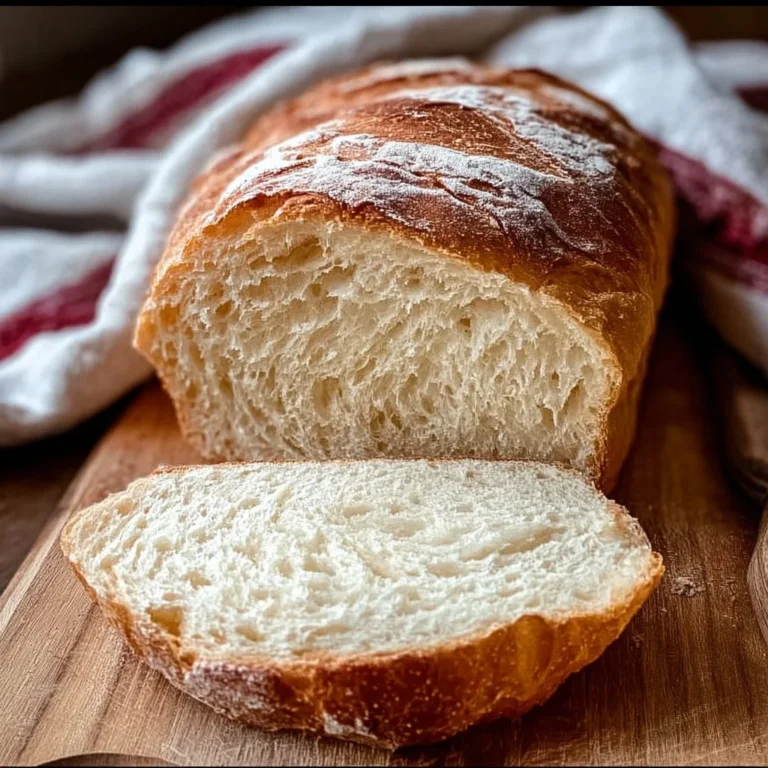
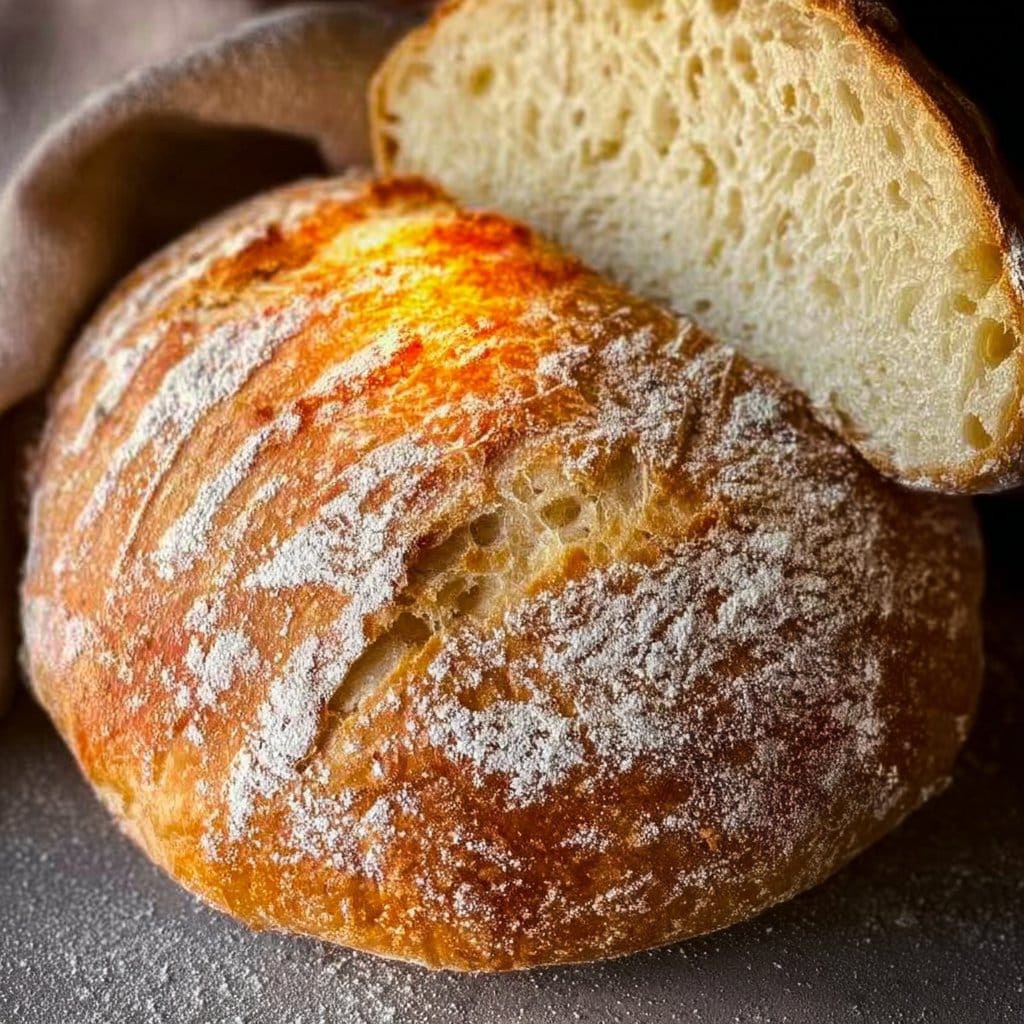
No Knead Gluten Free Bread: An Amazing Ultimate Recipe
The Magic of No Knead Gluten Free Bread
Ever walked past a bakery, inhaled that warm, yeasty aroma, and thought, “I wish I could have a slice right now”? Well, good news folks! You can whip up your own delicious No Knead Gluten Free Bread right at home with minimal effort. This recipe is not just any bread; it’s fluffy, crusty, and perfect for any occasion. Plus, it requires no fancy kneading techniques—who needs all that muscle anyway?
Why Make This Recipe
Let’s be honest, who doesn’t want homemade bread that’s easy and breezy? Here are three reasons you need this recipe in your life:
- No kneading required: Yup, you heard it right! Just mix and let the magic happen.
- Perfect for all: Gluten-free or not, everyone at the table will be reaching for a slice.
- Simple cleanup: One bowl, a mixing spoon, and a pot—easy peasy!
So get your apron on, it’s time to let those carbs shine! 😉
Ingredients
You don’t need fancy stuff—just these basics!
- 3 cups gluten-free all-purpose flour
- 1 ½ teaspoons salt
- 1 teaspoon instant yeast
- 1 ½ cups warm water
- 2 tablespoons olive oil (optional)
- 1 teaspoon apple cider vinegar (optional)
Directions
Follow these steps to create your No Knead Gluten Free Bread:
- Mix Dry Ingredients: In a large mixing bowl, whisk together gluten-free flour, salt, and instant yeast until well combined.
- Add Wet Ingredients: Slowly stir in the warm water, olive oil, and apple cider vinegar to the dry ingredients. Mix until fully incorporated; the dough will be sticky and loose.
- First Rise: Cover the bowl with plastic wrap or a clean kitchen towel. Let the dough rise at room temperature for 8-12 hours, preferably overnight.
- Prepare for Baking: After rising, preheat your oven to 450°F (232°C). Place a Dutch oven or heavy pot with a lid inside the oven to heat up.
- Shape the Dough: Flour your work surface lightly. Use a spatula to remove the dough from the bowl and fold it onto itself a couple of times. Form it into a rough ball without overworking it.
- Final Rise: Transfer the dough onto a piece of parchment paper. Cover lightly with a kitchen towel and let it rest for 30 minutes while the oven heats.
- Bake Bread: Carefully remove the hot Dutch oven from the oven. Using the parchment paper, lift the bread and place it into the pot. Cover with the lid and bake for 30 minutes.
- Remove Lid and Brown: After 30 minutes, remove the lid and bake for an additional 15 minutes to achieve a golden crust.
- Cool the Bread: Carefully remove the bread from the pot and allow it to cool on a wire rack for at least 30 minutes before slicing.
Following these steps will help you create a wonderfully delicious loaf that is sure to impress!
How to Make No Knead Gluten Free Bread: An Amazing Ultimate Recipe (Overview)
Okay, let’s recap the magic, shall we? Mix the dry ingredients, add your wet ones, and stir until combined. Let this beauty rise overnight (that’s the hard work done!). Preheat your oven, shape your dough lightly, and bake it to perfection.
Pro Tips:
- Don’t skip the overnight rise; it develops flavor.
- When shaping, keep it gentle; this isn’t a wrestling match. 🤼♂️
How to Serve No Knead Gluten Free Bread: An Amazing Ultimate Recipe
This bread is incredibly versatile! Serve it warm with a slather of butter, or toast it for a crunchy texture. Imagine it smeared with a fresh herb spread or dunked into your hearty soup—already drooling? The golden crust gives way to a fluffy interior that’s just waiting for you to take that first bite.
How to Store No Knead Gluten Free Bread: An Amazing Ultimate Recipe
Your freshly baked No Knead Gluten Free Bread will stay good at room temperature for about 3-4 days. If you want to keep it longer, pop it in the fridge for up to a week, or even freeze it for a rainy day. For best results, slice it before freezing; then just toast or warm it up when you’re ready to enjoy!
Tips to Make No Knead Gluten Free Bread: An Amazing Ultimate Recipe
Here are some insider tricks to elevate your bread game:
- Make sure your water is warm, but not too hot—think warm bath, not boiling.
- If you want extra flavor, experiment with different oils like coconut or add herbs to the mix.
- Don’t be afraid of the stickiness; it’s supposed to be that way. Just love it!
Variation
Feeling adventurous? You can easily switch things up by adding seeds like poppy or sesame for a nice crunch. For a hint of sweetness, throw in some dried fruit or herbs for a savory spin. Plus, if you skip the oil, you just made a vegan option! 😋
FAQs
1. Can I use any gluten-free flour?
Absolutely! Just ensure it’s a good blend designed for bread-making for the best results.
2. Can I make this ahead of time?
Yep! You can prep the dough and leave it to rise overnight, then bake it the next day.
3. How do I reheat leftover bread?
Just slice and pop it in the toaster, or wrap it in foil and warm it in the oven for a few minutes!
📌 Pin this recipe for your next cozy dinner night!

No Knead Gluten Free Bread
Ingredients
Method
- In a large mixing bowl, whisk together gluten-free flour, salt, and instant yeast until well combined.
- Slowly stir in the warm water, olive oil, and apple cider vinegar to the dry ingredients. Mix until fully incorporated; the dough will be sticky and loose.
- Cover the bowl with plastic wrap or a clean kitchen towel. Let the dough rise at room temperature for 8-12 hours, preferably overnight.
- After rising, preheat your oven to 450°F (232°C).
- Place a Dutch oven or heavy pot with a lid inside the oven to heat up.
- Flour your work surface lightly. Use a spatula to remove the dough from the bowl and fold it onto itself a couple of times. Form it into a rough ball without overworking it.
- Transfer the dough onto a piece of parchment paper. Cover lightly with a kitchen towel and let it rest for 30 minutes while the oven heats.
- Carefully remove the hot Dutch oven from the oven. Using the parchment paper, lift the bread and place it into the pot. Cover with the lid and bake for 30 minutes.
- After 30 minutes, remove the lid and bake for an additional 15 minutes to achieve a golden crust.
- Carefully remove the bread from the pot and allow it to cool on a wire rack for at least 30 minutes before slicing.